Surf Fishing Rig Diagram Guide
Rig diagrams make more sense when you understand what changes from one layout to another. Most surf rigs solve one of three problems: hold bait in place, let bait move naturally while keeping contact with the bottom, or present bait with minimal hardware. Once you recognize those categories, the diagrams become much easier to remember.
Choose a fixed bottom rig when you need the sinker to hold position, a sliding rig when you want less resistance on the take, and an unweighted freeline only when current and depth allow a natural drift.
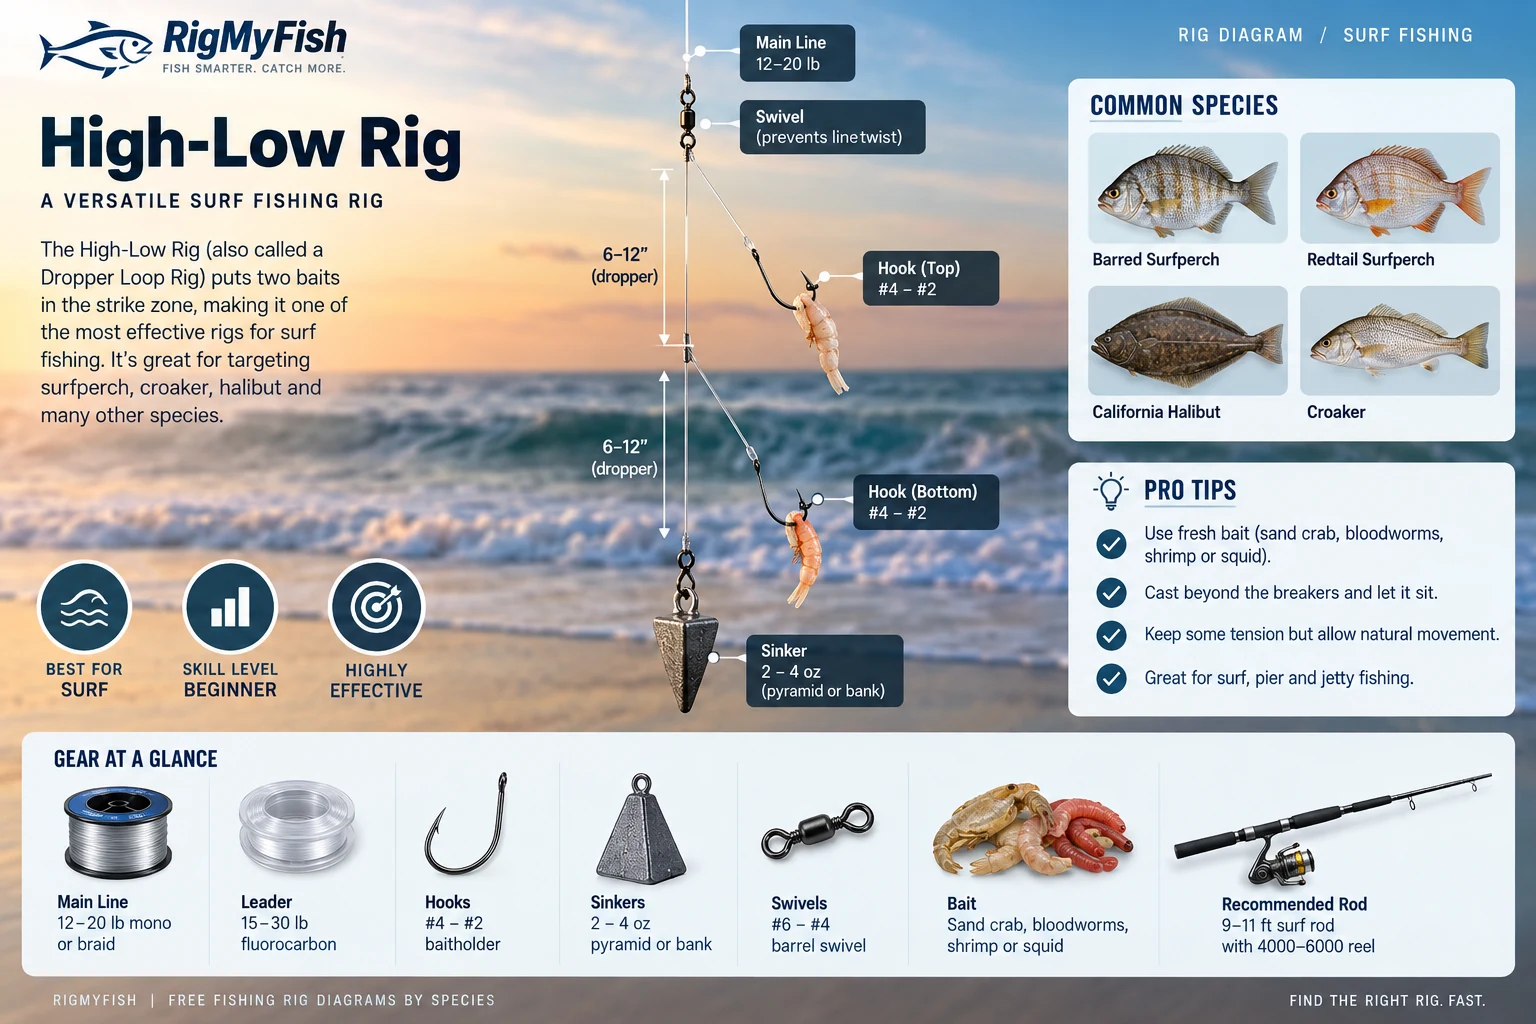
Fixed bottom rigs
High-Low, fireball, and pyramid-based setups keep the sinker in a defined place relative to the hooks. They are straightforward, stable, and easy to inspect after a cast.
Sliding rigs
Fish-Finder and Carolina layouts let line or leader move relative to the sinker. They are useful when natural movement and reduced resistance are more important than keeping multiple baits locked in one place.
Minimal hardware
A Freeline Rig removes the sinker entirely. It is only practical when the bait can reach and stay in the target zone without weight, but it can be very natural in shallow or clear conditions.
Related rig diagrams
Related species
Primary references
Technique guidance is educational. Seasons and regulations can change; verify current rules before fishing or keeping fish.
Common Questions
Why use a rig diagram instead of just a gear list?
A diagram shows the order and spacing of swivels, droppers, hooks, leaders, and sinkers, which is the part most likely to be misunderstood from text alone.
Which surf rig is easiest to remember?
The High-Low Rig is simple to visualize: main line at the top, two bait droppers on the leader, and the sinker at the bottom.
Do I need every rig in this guide?
No. One fixed bottom rig and one sliding rig cover a large share of surf situations. Add specialized rigs only when conditions give you a reason.